Please visit the site for complete tutorials and more resources for Chromecast programming!
Note: This is part of a multi-part series on developing web applications that integrate Google's Chromecast SDK. I am working on making a complete resource for web development with the Chromecast, so consider this a pre-release version and please comment if you see any issues or have recommendations on how to improve the tutorial.
Part 1 - Introduction
Part 2 - Getting Started
Part 3 - Hello World
Part 4 - Your Own First App
2 Getting Started
The first and foremost place to begin is the official Google Chromecast Developer’s site (https://developers.google.com/cast/).
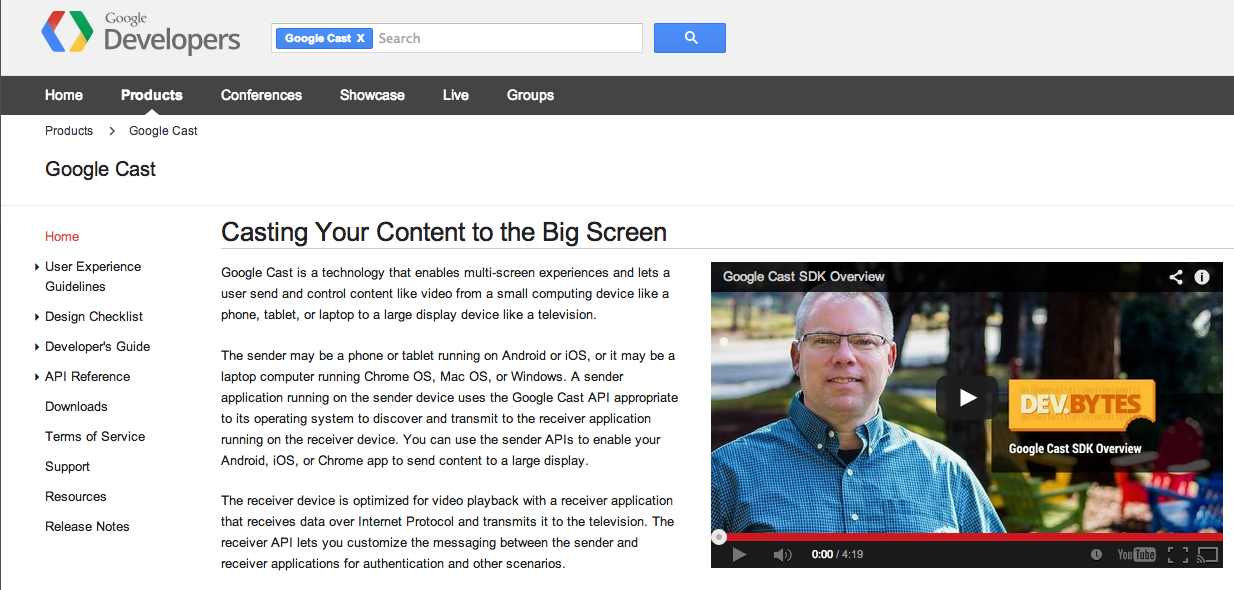
Figure 2-1 - The Chromecast Developer’s Homepage
If you’re reading this guide, it’s very likely that you have been to this site and left frustrated, exactly as I did. While the Chromecast is an excellent device, its documentation is unfortunately lacking. In the next few pages, I will be walking through the various steps required to begin working on developing a web application integrated with Chromecast.
Development Environment
I’m sure you already have a favorite text editor or programming environment setup. But if not, this is the part where you will want to download something more than just Notepad. Here are a few recommendations:
- Sublime Text: Free “Development Edition”, Mac, Windows, Linux http://www.sublimetext.com/
- Komodo Edit: Free, Mac, Windows, Linux http://www.activestate.com/komodo-edit/downloads
There are thousands of editors, but you’ll only need one with HTML and JavaScript support (unless you plan to make a more functional website with Python, PHP, Ruby, etc.). Once you have installed your editor, you can begin writing code.
Server Environment
Personally, I develop locally on my machine before deploying to a virtual server hosted through a provider such as Amazon, DigitalOcean, Linode, or one of many others. When developing for the Chromecast, you will need to have a web server reachable via the Internet. This is because the Chromecast communicates with server directly rather than over the local WiFi connection. For example, when you cast a YouTube video, Google is receiving the instructions for casting, pausing, playing, etc. via YouTube.com
If you want your own dedicated IP address and server, the quickest and simplest method of getting a server online is through DigitalOcean (http://digitalocean.com). Their simplest plans cost only $5 at the time of publishing and have enough resources to host basic websites. Alternatively, you can use GitHub Pages (https://pages.github.com) for hosting of HTML, CSS, JavaScript, and media files. The prior link explains how to setup GitHub pages, so I will not walk through every step of that process. In this book, I will be using a standard Ubuntu Server with a dedicated public IP address.
If you choose to use a standalone server, ensure that Apache or some other web server alternative is setup (such as nginx). I will not be walking through this process, as setting up Apache is one of the most popular how-to guides on the Internet.
Configuring the Chromecast
By default, the Chromecast is not setup for development. To enable development, you have to change a setting within the Chromecast Desktop App. You used this app when you first setup the Chromecast, but if you’ve deleted it since, you can redownload it at: https://cast.google.com/chromecast/setup/
Once you’ve installed the Chromecast application and ensured your device is online, click on the “Settings” button within the app.
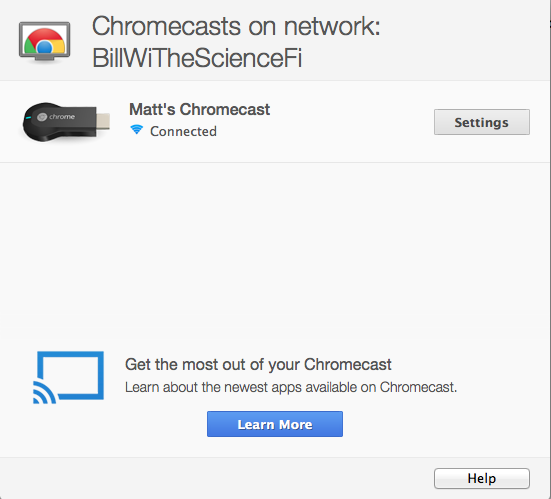
Figure 2-2 - Desktop Chromecast App
At the bottom of the settings page, check the box labeled “Send this Chromecast’s serial number to Google when checking for updates” and then reboot the Chromecast.
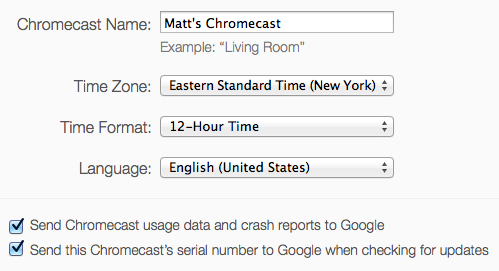
Figure 2-3 - Chromecast Development Settings
Once the Chromecast is configured, ensure that you have the Chrome Chromecast Extension installed. It should appear at the top right of your browser, and clicking it should enable casting of the current tab or media if it is a supported page such as YouTube.
Developer Tools
Once you have enabled the checkboxes above and rebooted, you will have access to the developer tools of the Chromecast device. These tools look very similar to the standard Chrome developer tools and will become helpful later when developing receiver applications, so you may wish to check that you can access them now and familiarize yourself with them. They are located on port 9222 of the Chromecast. Find the Chromecast’s IP address via the application used previously (under “Settings”) and then access the tools via the browser at http://<ip-address>:9222.
You are now ready to begin Chromecast development! There are a few more “Setup” steps that I will discuss later, but they are not required to begin. In the next section, we will walk through downloading and running a demo app provided by Google so that you can understand how the Chromecast SDK is integrated into a website.
I don't see the check box of "Send this Chromecast’s serial number to Google when checking for updates" on the setting page. Do you have any idea?
ReplyDeleteI also don't see the check box of "Send this Chromecast’s serial number to Google when checking for updates"
ReplyDelete