Please visit the site for complete tutorials and more resources for Chromecast programming!
Note: This is part of a multi-part series on developing web applications that integrate Google's Chromecast SDK. I am working on making a complete resource for web development with the Chromecast, so consider this a pre-release version and please comment if you see any issues or have recommendations on how to improve the tutorial.
Part 1 - Introduction
Part 2 - Getting Started
Part 3 - Hello World
Part 4 - Your Own First App
4 Your Own First App
Now that you’ve seen an official app from Google, we are going to begin writing our own app from scratch. Start a new project folder, called “MyFirstApp” within the /var/www directory of your server. Within this folder, create a file called “index.html” and then open it for editing within your editor of choice.
Including the Cast Chrome Sender API
In order to communicate with the Chromecast extension within Chrome, you will need to include the Chrome Sender API library. This is done very simply by including the following JavaScript within the <head> of your page like so:
<head>
<script type="text/javascript" src="https://www.gstatic.com/cv/js/sender/v1/cast_sender.js"></script>
</head>
|
A First Page
The code sample below shows a very basic first page that includes the Chrome Sender API, a custom JavaScript file called “script.js,” and a button. In the following steps, we will use JQuery to handle a button click, so take note that JQuery is also included within the page’s <head>. (Note: it is common practice to place the JQuery at the end of the page body so that it does not slow down the page load, but for simplicity’s sake, I am including it in the <head>.)
index.html
<!DOCTYPE html>
<html>
<head>
<title>My First App</title>
<script type="text/javascript" src="https://www.gstatic.com/cv/js/sender/v1/cast_sender.js"></script>
<script type="text/javascript" src="//ajax.googleapis.com/ajax/libs/jquery/1.11.0/jquery.min.js"></script>
</head>
<body>
<form>
<button type="button" id="castme">Click To Cast</button>
</form>
<script type="text/javascript" src="script.js"></script>
</body>
</html>
|
Save the index.html file and create another file in the root directory called “script.js.” This is where we will be placing all of the custom code to interact with the Chromecast, as well as code to handle the button click (which will eventually cast an image to the Chromecast). Within the script.js file, add the following:
script.js
$( document ).ready(function(){
var loadCastInterval = setInterval(function(){
if (chrome.cast.isAvailable) {
console.log('Cast has loaded.');
clearInterval(loadCastInterval);
initializeCastApi();
} else {
console.log('Unavailable');
}
}, 1000);
});
|
Let’s look at some key parts of this script. To start, it uses JQuery’s document.ready function to execute the code when the page has loaded. Secondly, it sets a one second (1000 milliseconds) interval which attempts to connect to the Cast API. If the API has not yet loaded, the loop will try again after a second. If it has, it calls the function “initializeCastApi()” and stops looping (clearInterval). I have also added some console logging so that we can debug within the browser.
If you save the files, browse to your page, and open the Chrome Developer Tools (within the browser, not the Chromecast Developer Tools), you should see the following:

Figure 4-1 - Initial Initialization
Notice that there is a ReferenceError because we have not coded the iniitalizeCastApi function yet. However, you should see “Cast has loaded.” Congratulations, you’ve initialized your first Chromecast app!
From here, there is a lof of code to type out in order to get even the most basic functionality. This is because the Chromecast API requires all sorts of functions for success and failures. I will do my best to walk you through each step. Begin by creating the initializeCastApi() function directly below your previous code:
script.js
function initializeCastApi() {
var applicationID = chrome.cast.media.DEFAULT_MEDIA_RECEIVER_APP_ID;
var sessionRequest = new chrome.cast.SessionRequest(applicationID);
var apiConfig = new chrome.cast.ApiConfig(sessionRequest,
sessionListener,
receiverListener);
chrome.cast.initialize(apiConfig, onInitSuccess, onInitError);
};
|
Immediately, you can see that there are now a number of functions we will need to create. But first, let’s understand this code.
The main objective of this code is to initialize a session with the Chromecast. To do this, the Chromecast requires an applicationID. This ID is provided via the cast API as the DEFAULT_MEDIA_RECEIVER_APP_ID (the ID of the Chromecast). For now, don’t worry about this ID; it is simply a unique ID associated with the Chromecast. However, later this ID will be customized when custom “receiver applications” (code that customizes the look and feel on the Chromecast) are used.
Once the applicationID is assigned, it is passed into the sessionRequest method which creates a session with the Chromecast. Next, an apiConfig object is created by passing the sessionRequest (just created), a sessionListener function (not yet created), and a receiverListener function (also not yet created) into the ApiConfig function of the Cast API:
var apiConfig = new chrome.cast.ApiConfig(sessionRequest,
sessionListener,
receiverListener);
|
Finally, the last step is to use the apiConfig object that was just created, along with success and error functions (onInitiSuccess and onInitError), to initialize the Chromecast setup.
The next step is to create the two callback functions, sessionListener and receiverListener, which we passed to the ApiConfig method earlier. Also, don’t forget about the onInitSuccess and onInitError functions, we will be creating those shortly as well.
Sessions
A session, very simply put, is a period of time during which a user has connected to, and is interacting with, the Chromecast API. To use YouTube as an example, if you cast a video from the YouTube video page, you have created a session with the Chromecast. Browsing to a different page, then coming back to YouTube, or refreshing the original page does not change that session. The session exists until it is either destroyed by the user (disconnecting via the Cast extension), destroyed programmatically, or destroyed via a connection error. Now, we are going to create the sessionListener function which was passed to the ApiConfig method earlier. First, add a global JavaScript variable called “session” at the top of your code:
script.js
var session = null;
$( document ).ready(function(){
...
|
Then, add a sessionListener function at the bottom of your script.js file:
script.js
function sessionListener(e) {
session = e;
console.log('New session');
if (session.media.length != 0) {
console.log('Found ' + session.media.length + ' sessions.');
}
}
|
This code establishes a session if one does not exist; but if a session does exist, it will log that fact. We will dive deeper into session management later in this book.
Receivers
The Chromecast API works by using a sender (the application we are writing) and a receiver (the application running on the Chromecast). The sender sends instructions to the receiver which then executes them. The “receiverListener” callback function, which was passed to the ApiConfig method earlier, is responsible for ensuring a valid receiver application is available. In other words, it makes sure that a Chromecast on the network is capable of receiving instructions. Add a receiverListener as follows:
script.js
function receiverListener(e) {
if( e === 'available' ) {
console.log("Chromecast was found on the network.");
}
else {
console.log("There are no Chromecasts available.");
}
}
|
Success and Error Functions
Remember earlier when we passed “onInitiSuccess” and “onInitError” to the initialize method? Well now we are going to define what should happen when the initialization either succeeds or fails. Add the following functions at the end of the script.js file:
script.js
function onInitSuccess() {
console.log("Initialization succeeded");
}
function onInitError() {
console.log("Initialization failed");
}
|
You can now save the file and test your work. Reloading the page should result in the following appearing within the JavaScript console of the Developer Tools:
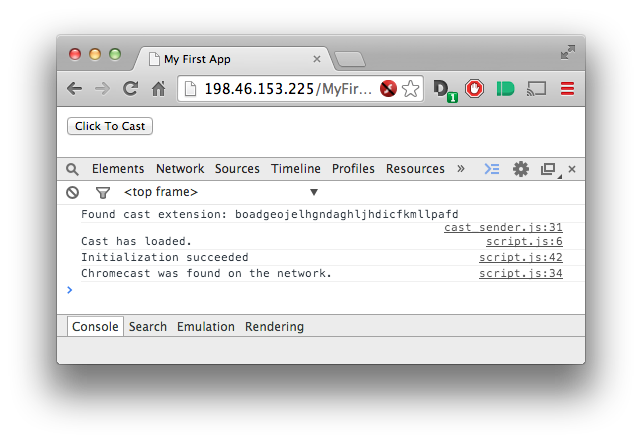
Figure 4-2 - Successful Initialization
Involving the User
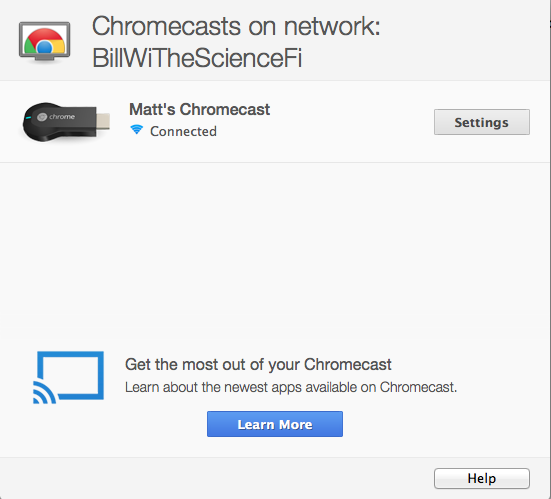
The next step involves user interaction in order to complete successfully. Because of security concerns, your application cannot simply commandeer a user’s Chromecast and begin casting on its own. Instead, Google requires that you prompt the user (by launching the Chromecast extension dialog) to select a device to which the media should be sent.
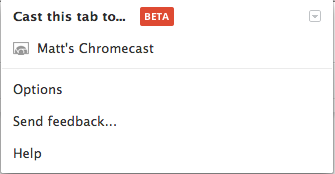
Figure 4-3 - The Familiar Cast Extension Popup
In order to launch this dialog, we need a function called “launchApp” to be called when when we want to launch the casting. We can do that by attaching a click event handler to the button we created earlier:
script.js
$('#castme').click(function(){
launchApp();
});
|
Notice the addition of the “launchApp()” call when the button is clicked. Now, create the “launchApp” function:
script.js
function launchApp() {
console.log("Launching the Chromecast App...");
chrome.cast.requestSession(onRequestSessionSuccess, onLaunchError);
}
|
The second line of the function calls the requestSession method of the cast object. This method takes two arguments: onRequestSessionSuccess, which is called when a session has been successfully created (i.e. the user selected a Chromecast from the dialog), and onLaunchError, which is called when the session fails for some reason (most commonly when the user does not select a Chromecast from the popup).
In order to successfully test these new additions, we first need to create the two functions referenced above. Eventually, we will be adding a lot more functionality to the onRequestSessionSuccess function, but for now we will simply assign the session to the session variable and then log the result. The error function will simply log what happened if the user does not select a device from the popup. Here is the new code:
script.js
function onRequestSessionSuccess(e) {
console.log("Successfully created session: " + e.sessionId);
session = e;
}
function onLaunchError() {
console.log("Error connecting to the Chromecast.");
}
|
This page can now be tested in the browser. Reload the page and click the button and you should see the popup appear. If you pick a Chromecast, you should see the success message. If you do not, you should see the error.

Figure 4-4 - Clicking the Cast Button
Notice that the text of the popup no longer says “Cast this Tab,” but instead says “Cast <website name> to…”. This is because the official Cast API is being invoked. If you select your Chromecast from the list, you will now see the success message in the console. Clicking out of the window without selecting a device will cause the error message to be displayed.
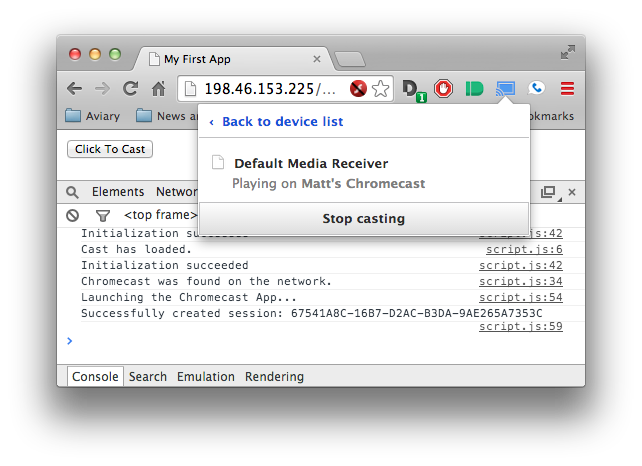
Figure 4-5 - Successful Casting
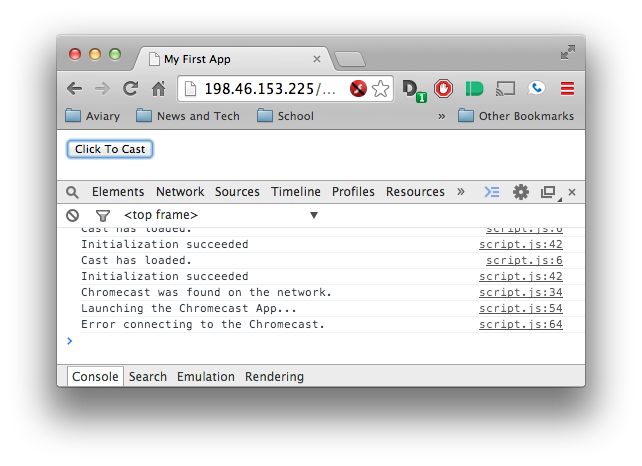
Figure 4-6 - Unsuccessful Casting
We now have a session with the Chromecast! This means that we can send media to the device to display on the user’s television (hasn’t the Internet come a long way?).
Casting Media
There are a number of moving parts when it comes to casting media to the device once a session has been established, so I am just going to start out with the shortest amount of code that can cast an image, then walk through the pieces. First, edit the onRequestSessionSuccess function to call a function called “loadMedia” on success:
script.js
function onRequestSessionSuccess(e) {
console.log("Successfully created session: " + e.sessionId);
session = e;
loadMedia();
}
|
Then, add the following code to the end of the script file:
script.js
function loadMedia() {
if (!session) {
console.log("No session.");
return;
}
var mediaInfo = new
chrome.cast.media.MediaInfo('http://i.imgur.com/IFD14.jpg');
mediaInfo.contentType = 'image/jpg';
var request = new chrome.cast.media.LoadRequest(mediaInfo);
request.autoplay = true;
session.loadMedia(request, onLoadSuccess, onLoadError);
}
function onLoadSuccess() {
console.log('Successfully loaded image.');
}
function onLoadError() {
console.log('Failed to load image.');
}
|
The first function, “loadMedia,” is the function called when a session is successfully initialized. The first thing it does is make sure that a valid session is set. If not, there is nothing to cast, so it returns without doing anything. However, if a session does exist, a new “mediaInfo” object is created by calling chrome.cast.media.MediaInfo and passing in a URL of an image (movies, GIFs, and other media can be passed in, but for now let’s stick with images). This image URL is one of a cute kitten hosted on Imgur.
Once created, mediaInfo can be passed into the LoadRequest method of chrome.cast.media. This is assigned to the request object which is finally passed into the session.loadMedia method. Although this sounds complex or as if it is additional, unnecessary work, the methodology will become clear later when more attributes are added to the image and when custom receiver applications are used.
The final two functions are simply success and failure callbacks which log the result of casting the image. Now that everything is in place, let’s try to cast! Save the page, reload, and then cast to your device. If everything goes right, you should see an image of a kitten on your television. (Note: if the image URL no longer works in the distant future, simply replace it with any .jpg image URL.)
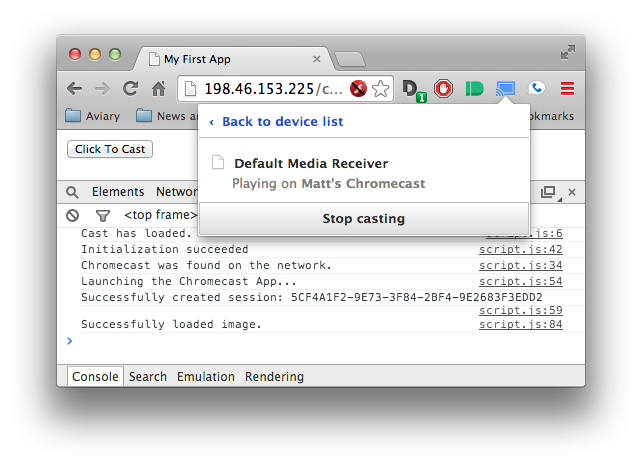
Figure 4-7 - Successfully Casting an Image
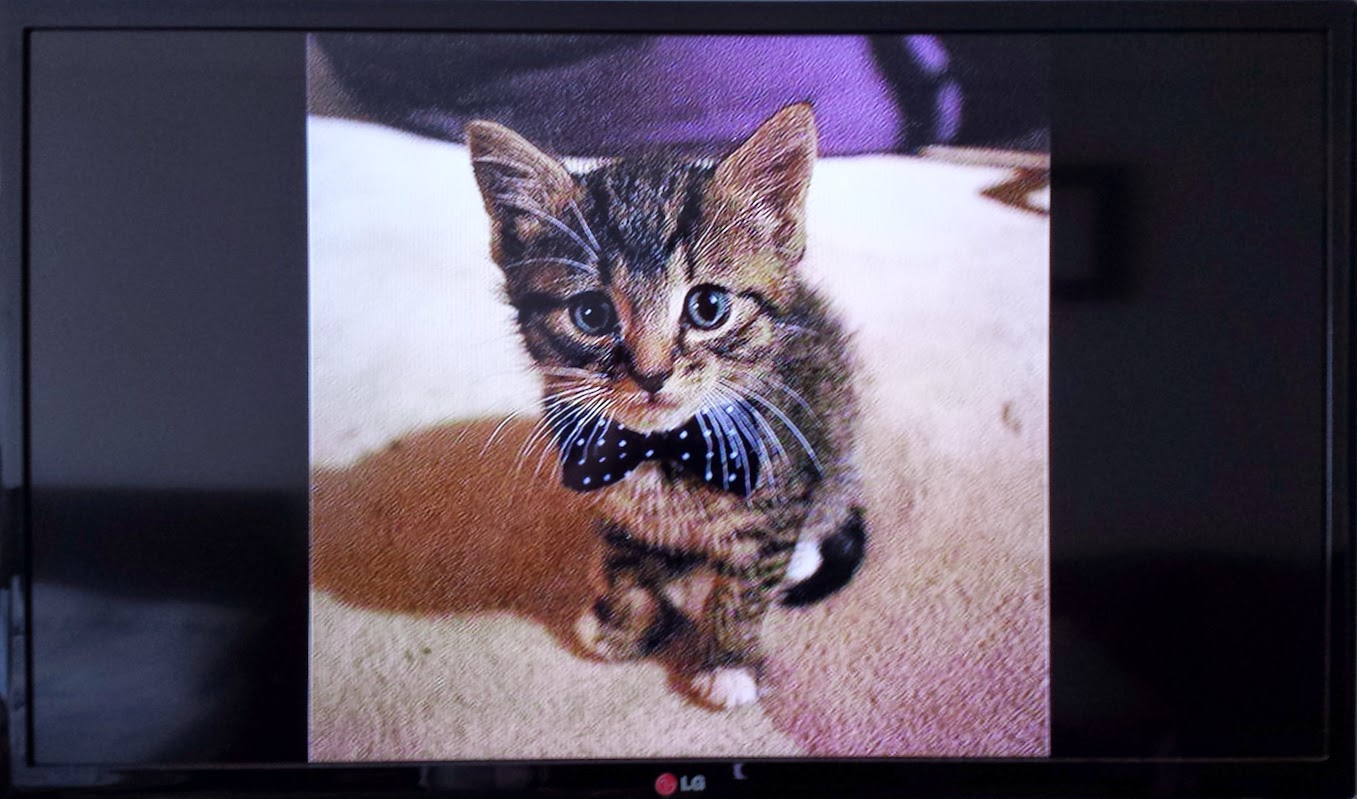
Figure 4-8 - Image Casting to Television
Ending the Session
The final step in the application is to stop the casting session. A user can initiate this process by clicking the “Stop Casting” button within the Chrome extension, but in many cases, you will want to stop a session programmatically, or provide a button within your web application that can stop the session. To do this, first add a button to your index.html file:
index.html
…
<form>
<button type="button" id="castme">Click To Cast</button>
<button type="button" id="stop">Click To Stop</button>
</form>
…
|
Now, add a button click event handler in your script:
script.js
$('#stop').click(function(){
stopApp();
});
function stopApp() {
session.stop(onStopAppSuccess, onStopAppError);
}
function onStopAppSuccess() {
console.log('Successfully stopped app.');
}
function onStopAppError() {
console.log('Error stopping app.');
}
|